What Is OctaneRender

About this Guide
If you are brand new to Octane or 3D rendering in general and don't mind a bit of backstory and theory before getting your hands dirty, this is a good series to start with. More of a learn-by-doing type of person and are using C4D? Try the Getting Started Guide
If you're an old hand, there still might be some net new-to-you concepts here that trigger a "when the ___ did that happen?!" response.
This entire series is meant to be as DCC-independent as possible. It doesn't matter if you're using Standalone, the Blender plugin, the C4D plugin, the Houdini plugin, or any other flavor of OctaneRender. It's more a 'how it works' thing than a 'how to work with it' thing.
This guide is also available in 📄 PDF format here
Series Intro|Series Intro
3D rendering is complex.
There's a lot of new terminology, a lot of moving pieces, and tools, techniques, and features change constantly. On top of that, it takes some amount of spatial awareness, observation and critical thinking skills, underlying design knowledge, and a touch of nerdiness needed to get good at it.
The learning curve for it is also weird. It's pretty easy to follow steps and reproduce something someone else did, but it takes a ton of context to understand why each decision to select and alter a particular slider was made. Some effects look amazing, and you'd think they'd be crazy hard to achieve and kill your machine, but they really only take adjusting one or two settings and can happen in near real-time. Others seem like they should be no-brainers, but they actually require several things to go right to even start to look realistic, and are murderous on the GPU for seemingly inexplicable reasons.
The goal of this series is to get you oriented in the world of Octane. Explain what it does and what it doesn't do, and give you a jumping-off point to go down as many rabbit holes as you want until your curiosity has been satisfied (or until you decide to go back to school to become a material scientist or electrical engineer.)
OctaneRender - A Primer|OctaneRender - A Primer
Rendering (in 3D) is the act of taking lights, geometry, materials, physical effects, motion data, and a bunch of other factors and running them through a series of calculations to produce one or more "baked" images that we typically consume as JPEGs, TIFFs, PNGs, MP4s, etc.
The Engine: OctaneRender
OctaneRender (often just referred to as "Octane") is a GPU-only 3D render engine developed by Otoy. It requires an NVIDIA GPU (Windows or Linux), or an Apple Silicon chip (M1, M2, etc). It doesn't work on the CPU or any other type of GPU. You'll need a recent Mac or supported NVIDIA card to follow along at home.
OctaneRender is just the engine itself. It doesn't actually generate any models or lights or materials, it pulls these things in, runs a bunch of calculations on them using a GPU, and spits out image data. What makes it stand out from its peers is how it operates under the hood. This guide won't get into what these terms mean (later ones in this series will break it down), but just for some early exposure to the jargon, here goes:
OctaneRender is a spectral, (mostly) unbiased, physically-based path tracer.
Later guides unpack that much more thoroughly, but that's the secret sauce that allows it to produce realistic-looking renders without having to fiddle with too many knobs and switches compared to other render engines.
Octane Plugins
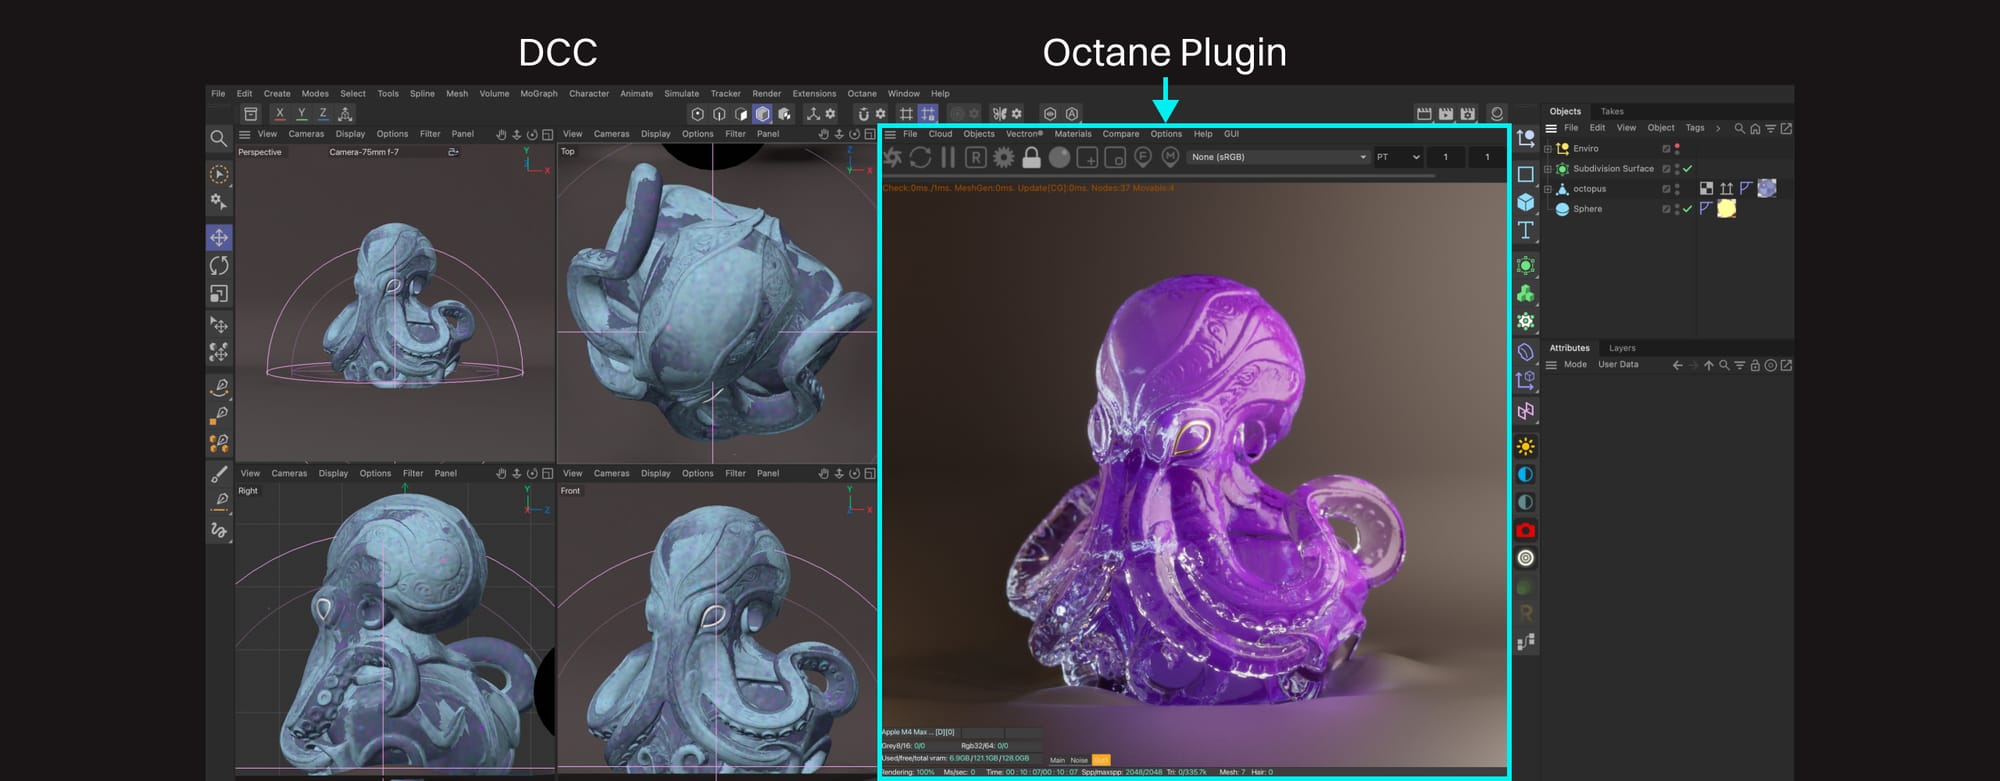
The engine needs to get all this other stuff from somewhere, and most of the time, that somewhere is what's often referred to as a DCC (Digital Content Creation tool). The standard ones in the industry are 3DS Max, Maya, Cinema 4D, Blender, and Houdini.
All of these DCCs already have their own render engines, but they also allow for plugins, and that's how we can access Octane within them. Octane plugins not only include the engine, but descriptions for how the engine needs lights, materials, camera data, and other things formatted for it, and a handful of other tools, objects, and utilities that generate or manipulate other data specifically for it.
Important: Each DCC is unique in how it handles its material, lighting, environment, and other systems, so in order to get OctaneRender to communicate with these, it has to be tailored for each DCC. This introduces a number of quirks and UI inconsistencies from DCC to DCC. Bouncing between DCCs and still using Octane isn't hard per se, but it's more complicated than it seems like it should be, and that's why.
Octane Standalone
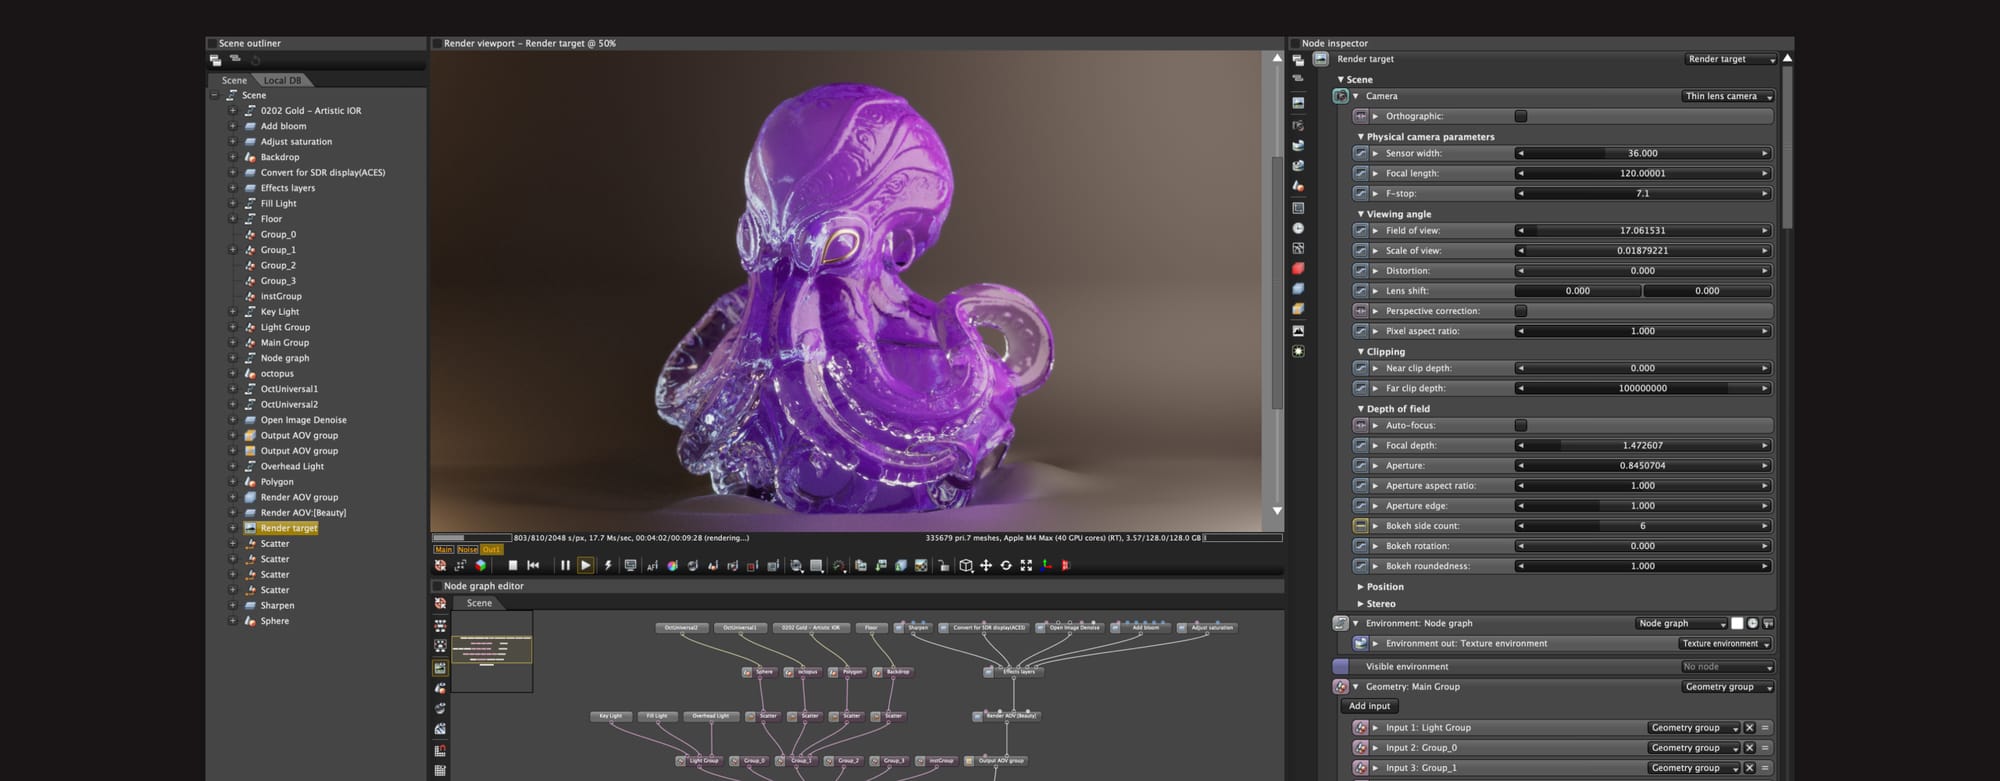
In addition to the plugins, Otoy also develops its own DCC called Octane Standalone. This serves a few different purposes.
- It's the source of truth for how Octane is meant to work. If a certain feature or setting is acting screwy in a particular DCC, we can go to Standalone to see what it's supposed to do.
- Depending on our workflow, we can just use it as-is for the rendering portion of our setup. We can build models or animations in an external app, export them to standard formats like OBJ or FBX, import them into Standalone, and do the rest there.
- It's really fast. The plugins have to round-trip data between the DCC and the engine, which takes some time. Some DCCs are more efficient than others depending on their architecture and how deeply the plugin can be integrated, but it all comes with some kind of overhead. Standalone bypasses all that and just starts to bang out images as soon as we hit go.
Standalone has the same tools, objects, and utilities as the plugin versions. It also has its own node editor for editing materials, lights, and other objects. Most of the time we'll be importing models created by other DCCs, but Octane does have its own geometry creation system called Vectron (vector-polygon) that allows us to create and boolean primitives.
Octane in the Pipeline|Octane in the Pipeline
Real quick, here's a typical 3D pipeline, and where Octane sits in it:
Overall workflow
These are the basic components that are needed to make a 3D thing. There are large generalist tools like Maya, 3DS MAX, or Cinema 4D that try to combine all of them (with varying levels of success), or smaller specialist tools like Plasticity or OctaneRender that focus on a few of these parts.
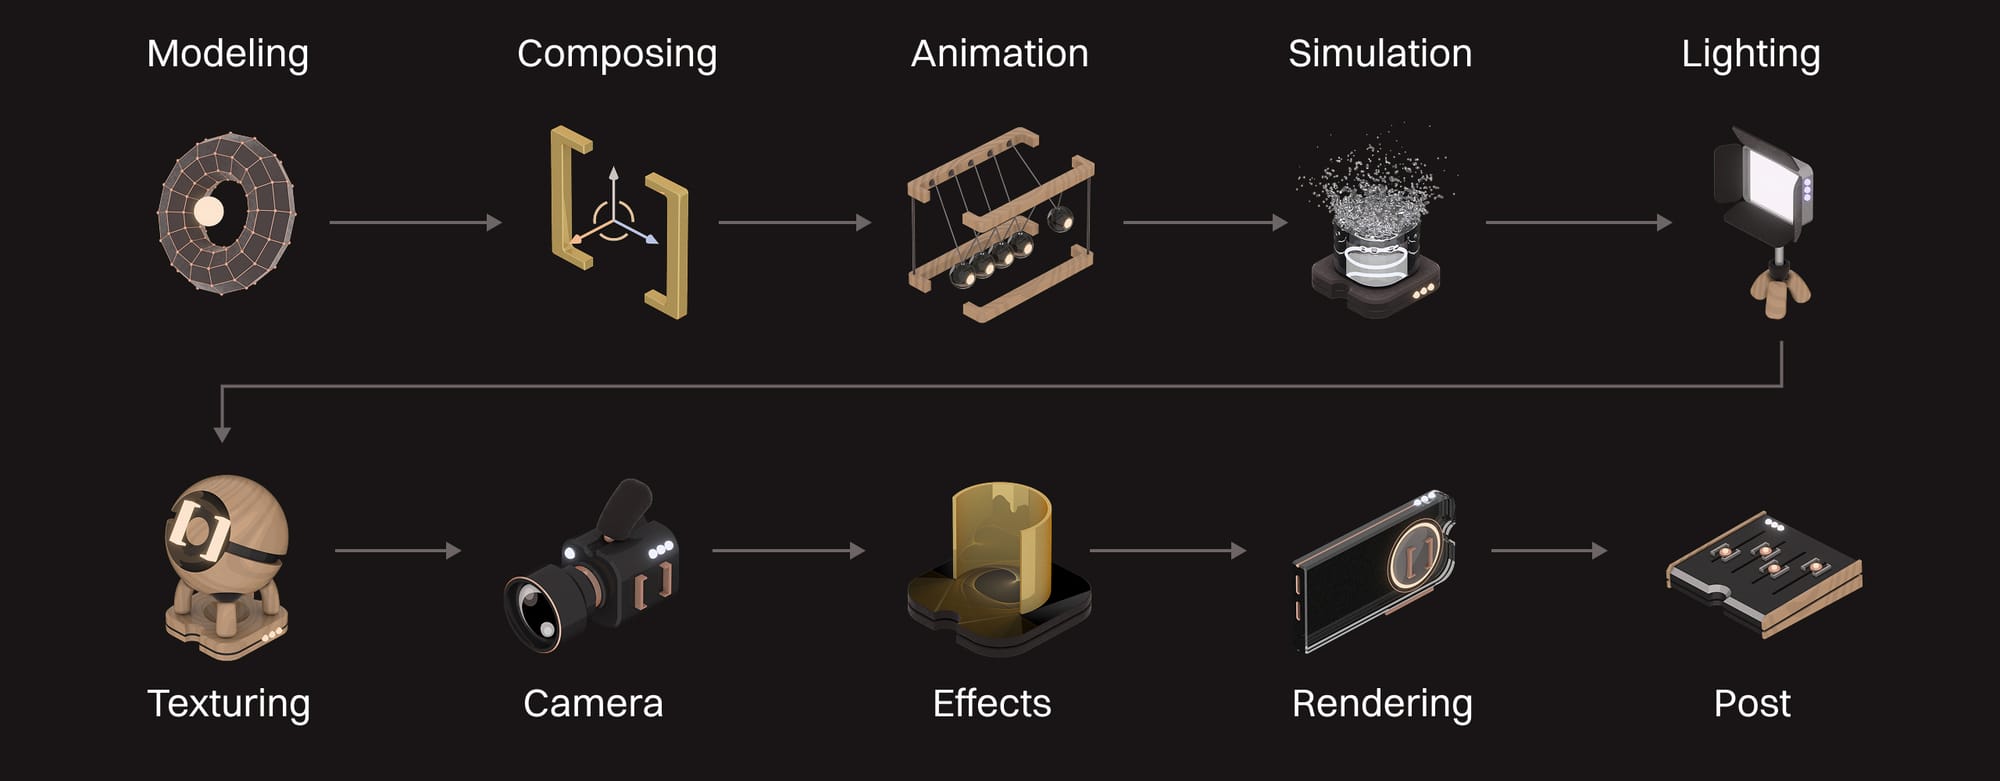
First, stuff has to get made:
- Modeling is creating polygon or NURBS (mathematically-derived) objects called "models", "geometry", "geo", or just "objects".
- Composing is taking a bunch of these geometry objects and placing them in a scene.
- Animation is adding motion over time.
- Simulation is applying physical forces to make the models deform, collide, and react to each other more realistically.
Then it all needs to look good:
- Lighting is where an environment and lights are placed in the scene so we can see things.
- Texturing is the catch-all term for adding visual properties to the models so light interacts with them in interesting ways.
- Camera properties are added here to achieve effects like depth of field, motion blur, distortion, and other camera-ey things.
- Physical effects like caustics, global illumination and the like are either simulated or cheated in to add realism.
Finally, it's time to produce some usable deliverables.
- Rendering is taking everything done up until now and running it through a series of calculations to produce one or many frames of pixel data that can be saved as files.
- Post-processing is taking said pixel data and further manipulating it to give it a particular look, fix errors, add pizazz and effects, and whatever else that's easier to do on baked images than in-render.
Octane Plugins
If you're using a DCC like C4D, Blender, or Houdini with one of the plugins, the DCC itself does nearly all the creation, composing, animation, and simulation. Octane does have some creation tools, but honestly the DCC is likely where you're going to be building all your objects, so this series isn't going to focus on that.
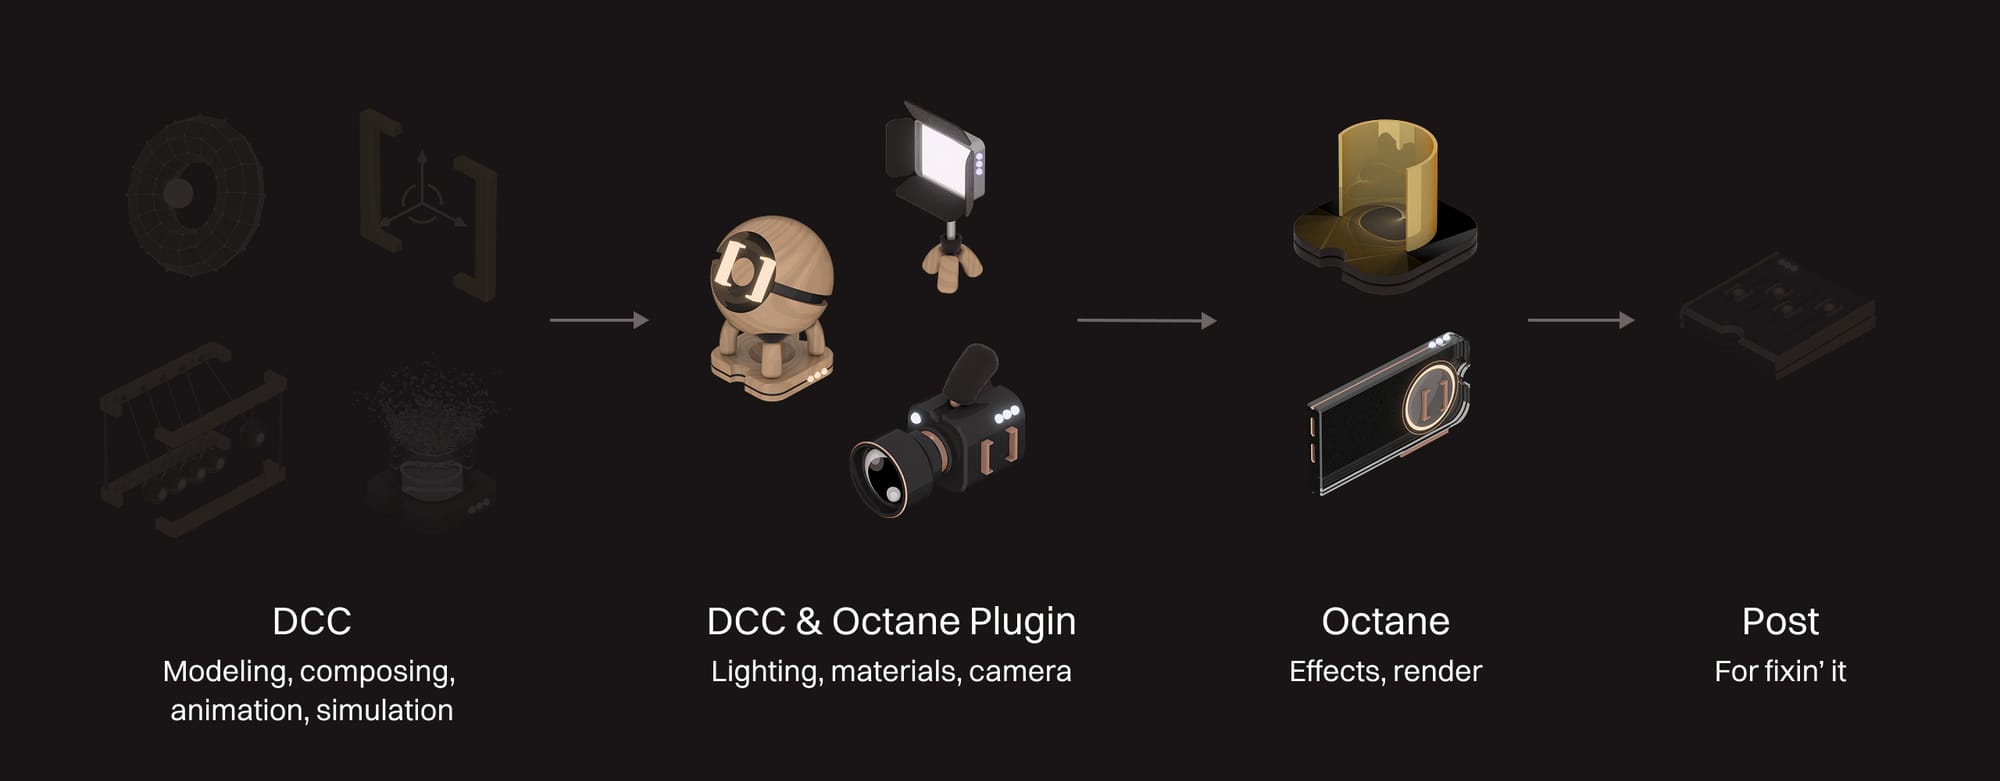
There's this brackish area where Octane components merge in with or sit on top of native DCC objects (cameras, materials, lights) to feed the engine the right data.
OctaneRender handles the fancy physical lighting calculations (light bounces, caustics, etc.), and the rendering part (turning all this into pixel-based images).
Then it's off to post. Octane itself can do some pretty good post-production via nodes which is implemented in the plugin, or renders can just be exported and transferred to a dedicated post app.
Octane Standalone
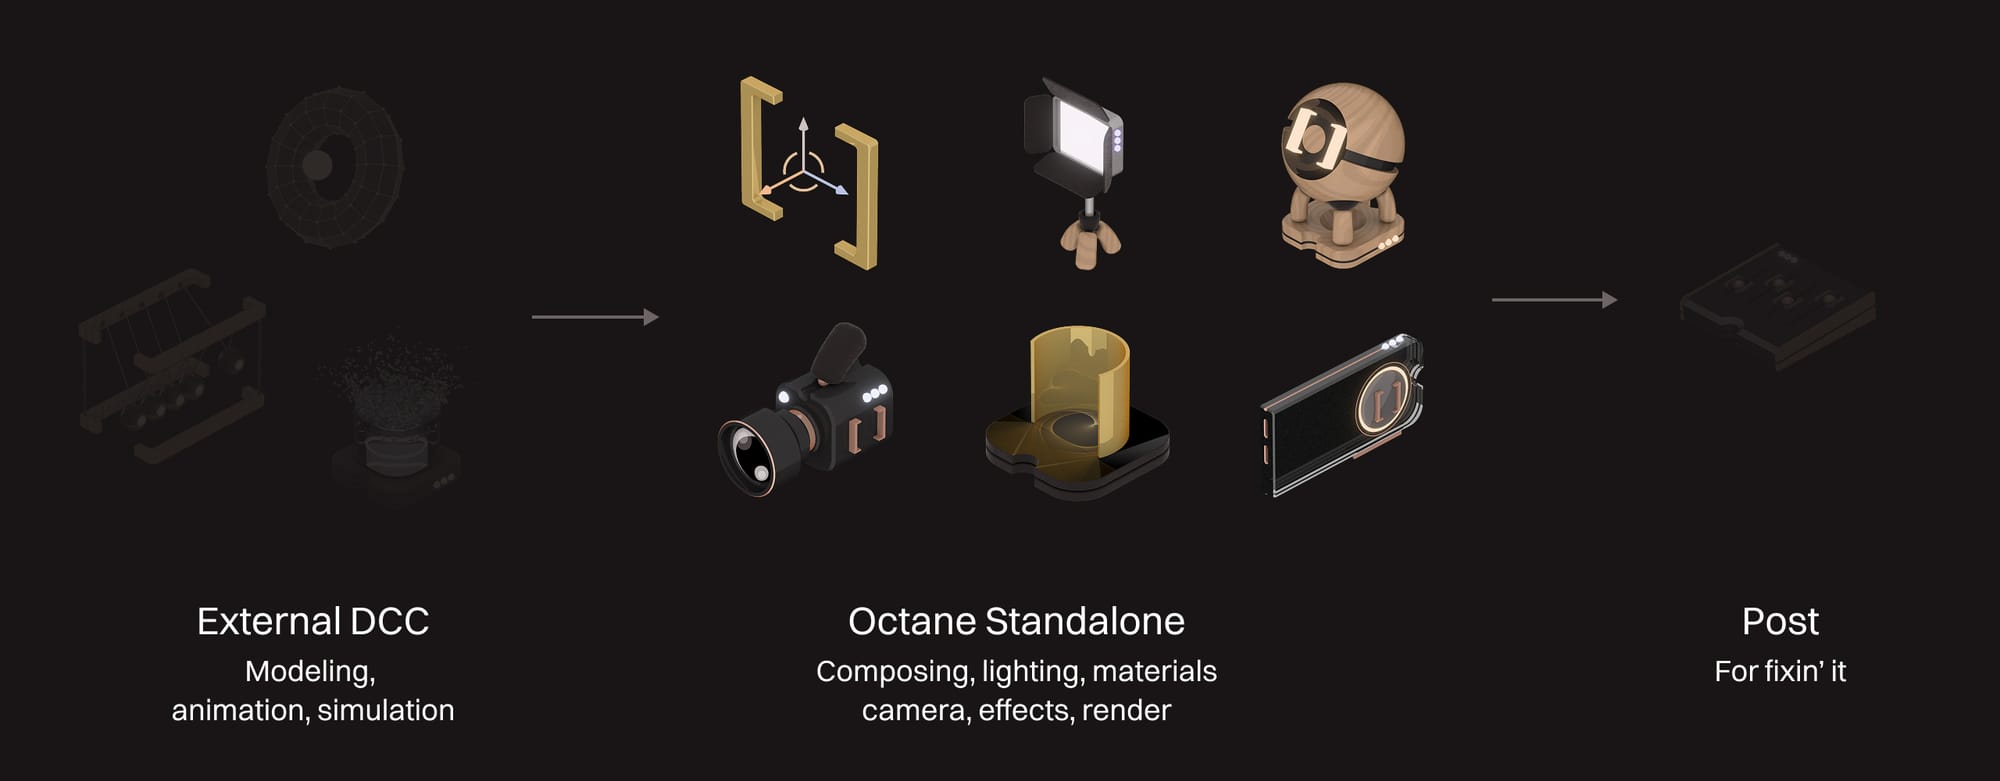
The other route is using Standalone.
Like in the plugins, most of the modeling, and all the animation and simulation will be done using a different DCC that specializes in that kind of work. It all gets imported into Standalone via a variety of formats like FBX, Alembic, etc.
Standalone has native objects, editors, and frameworks for lights, cameras, materials, and everything else in the "needs to look good" section.
Once again, OctaneRender (the engine) handles the light calcs and rendering part (it's the same engine, it's just in its own DCC now). It also has all of Octane's post tools and options, or it can export files for a dedicated post app.
Wrap Up
So that's Octane in a nutshell. The rest of this series touches on its capabilities and gives some high-level insight into how to best work with it while keeping frustration and overwhelm at a minimum.