Interacting with OctaneRender
About This Guide
This is part of a conceptual, DCC-agnostic series on how OctaneRender works. This guide looks at the render viewport, node editor, and types of settings we'll encounter.
This guide is also available in 📄 PDF format here
Intro and Overview
Because OctaneRender exists in so many forms, all the different tools and options are in different places from DCC to DCC. Regardless of whether we're using Standalone, C4D, Houdini, Blender, or any of the other plugin-based versions, there are three common UI touchpoints that always show up that are worth calling out now:
The Render Viewport|The Render Viewport
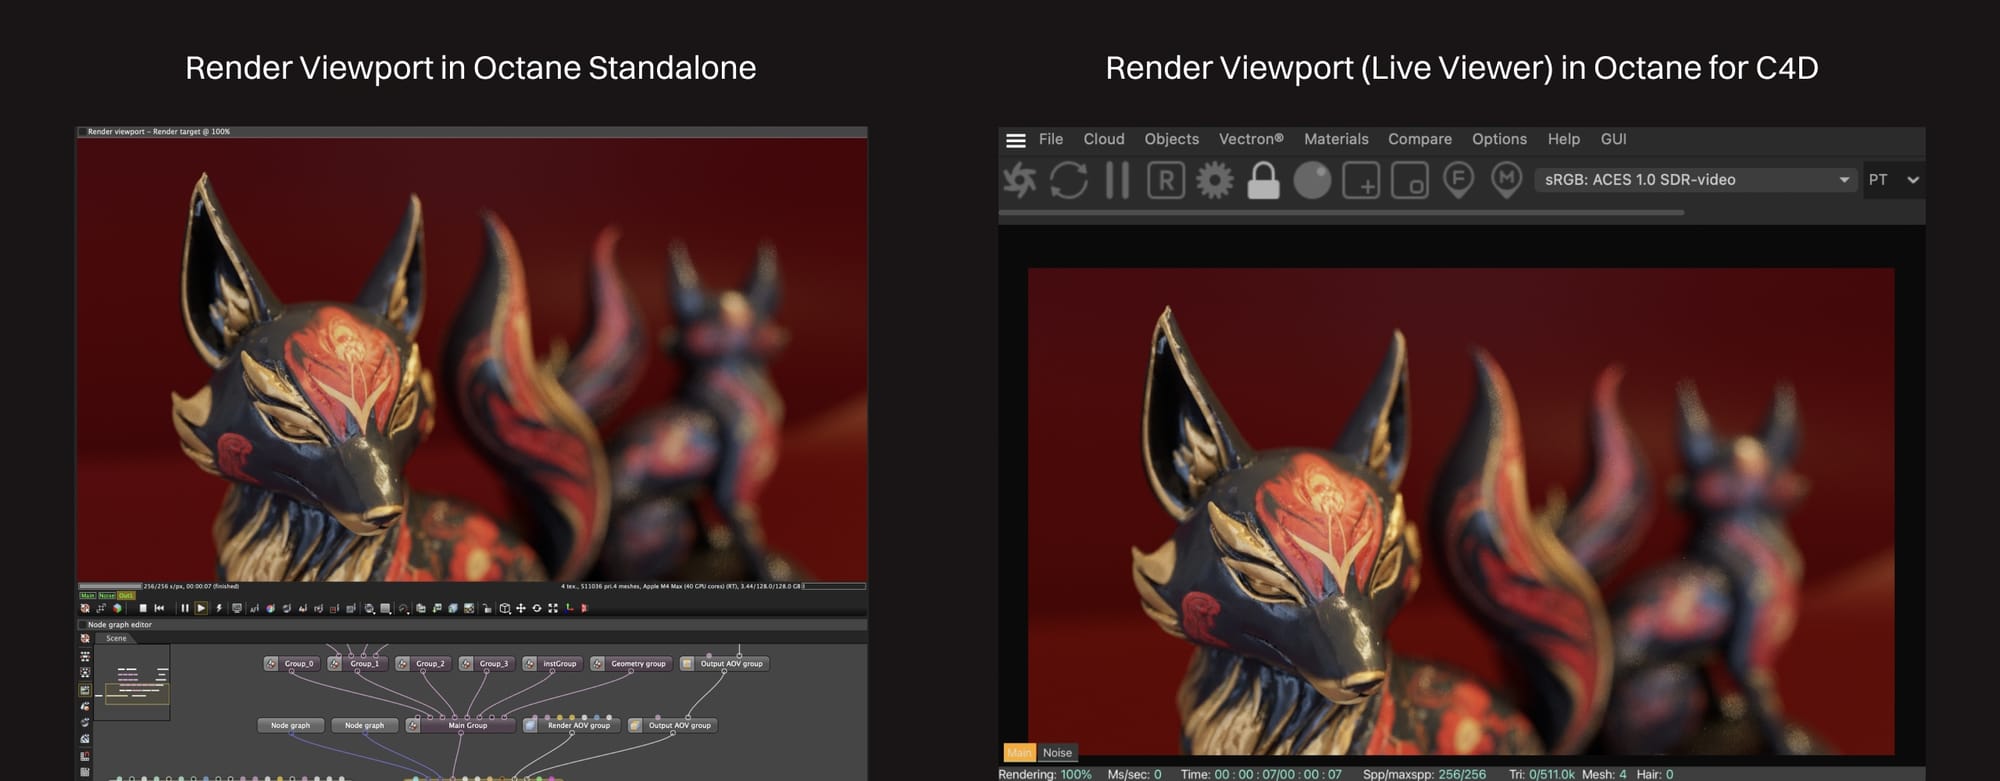 In Octane Standalone, the window that shows us a live view of the render in progress is called the Render Viewport. In Cinema 4D it's called the Live Viewer Window. In Houdini it's the QT5 IPR. In Blender it's just integrated into a regular viewport and is toggled on via a switch. This is another example of the plugin having to conform to the DCC, but it works the same everywhere - it's a viewport that shows the render.
As soon as it's activated, Octane moves data into VRAM and does some other pre-prep stuff, and then renders out the first set of pixels. Unless our scene is just ridiculously easy for the GPU to process, this first pass is going to be super rough and noisy, but the important part is that it's there for us to see. We'll know right away if we forgot to unhide something, make our hero object blue instead of red, or other large-scale issues that would cause us to immediately jump into action to correct course.
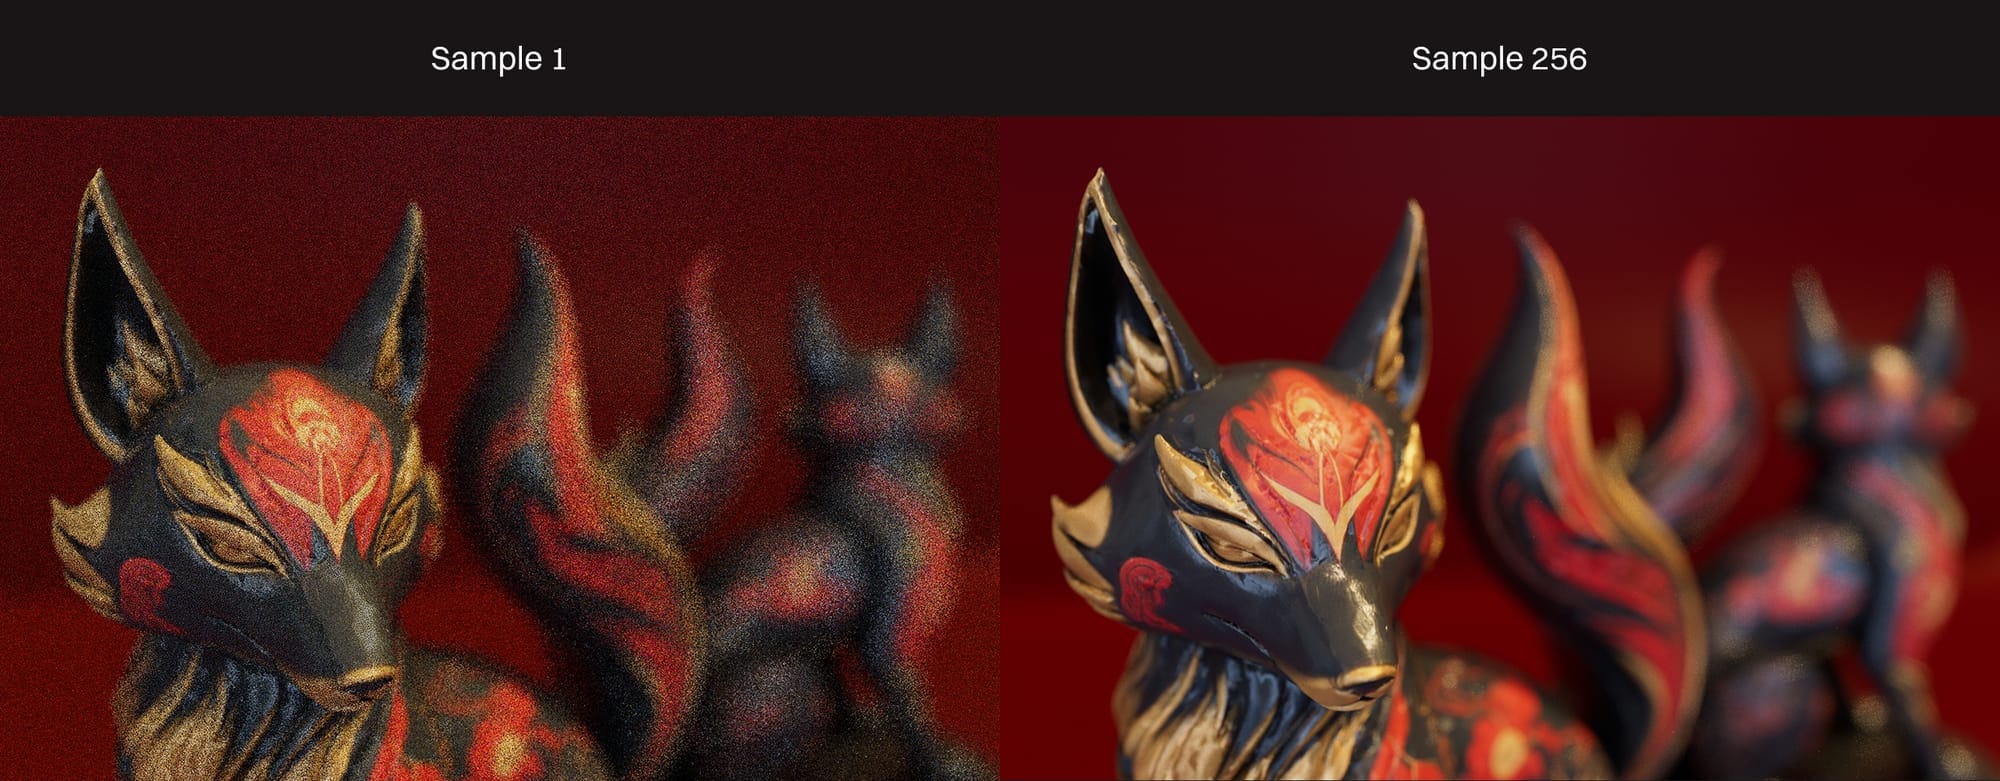
If we let it keep going, it starts to clean up the image in passes that are commonly referred to as "samples". It keeps looking better and better until it hits the maximum number of samples we set (or we stop it). At this point, we have rendered pixel data that we can save, or we have a good enough idea of what the image will look like so that we can begin our final render process.
Important: Rendering is hard on the GPU. Since running the Render Viewport is causing Octane to perform all the same calculations it would use for the final render, it's going to eat our system resources. We'll go more into this in the performance part of this series, but it's something to be aware of - we don't want to be taxing our GPUs with other tasks while we have the Render Viewport running or our entire system performance will suffer.
The Node Editor|The Node Editor
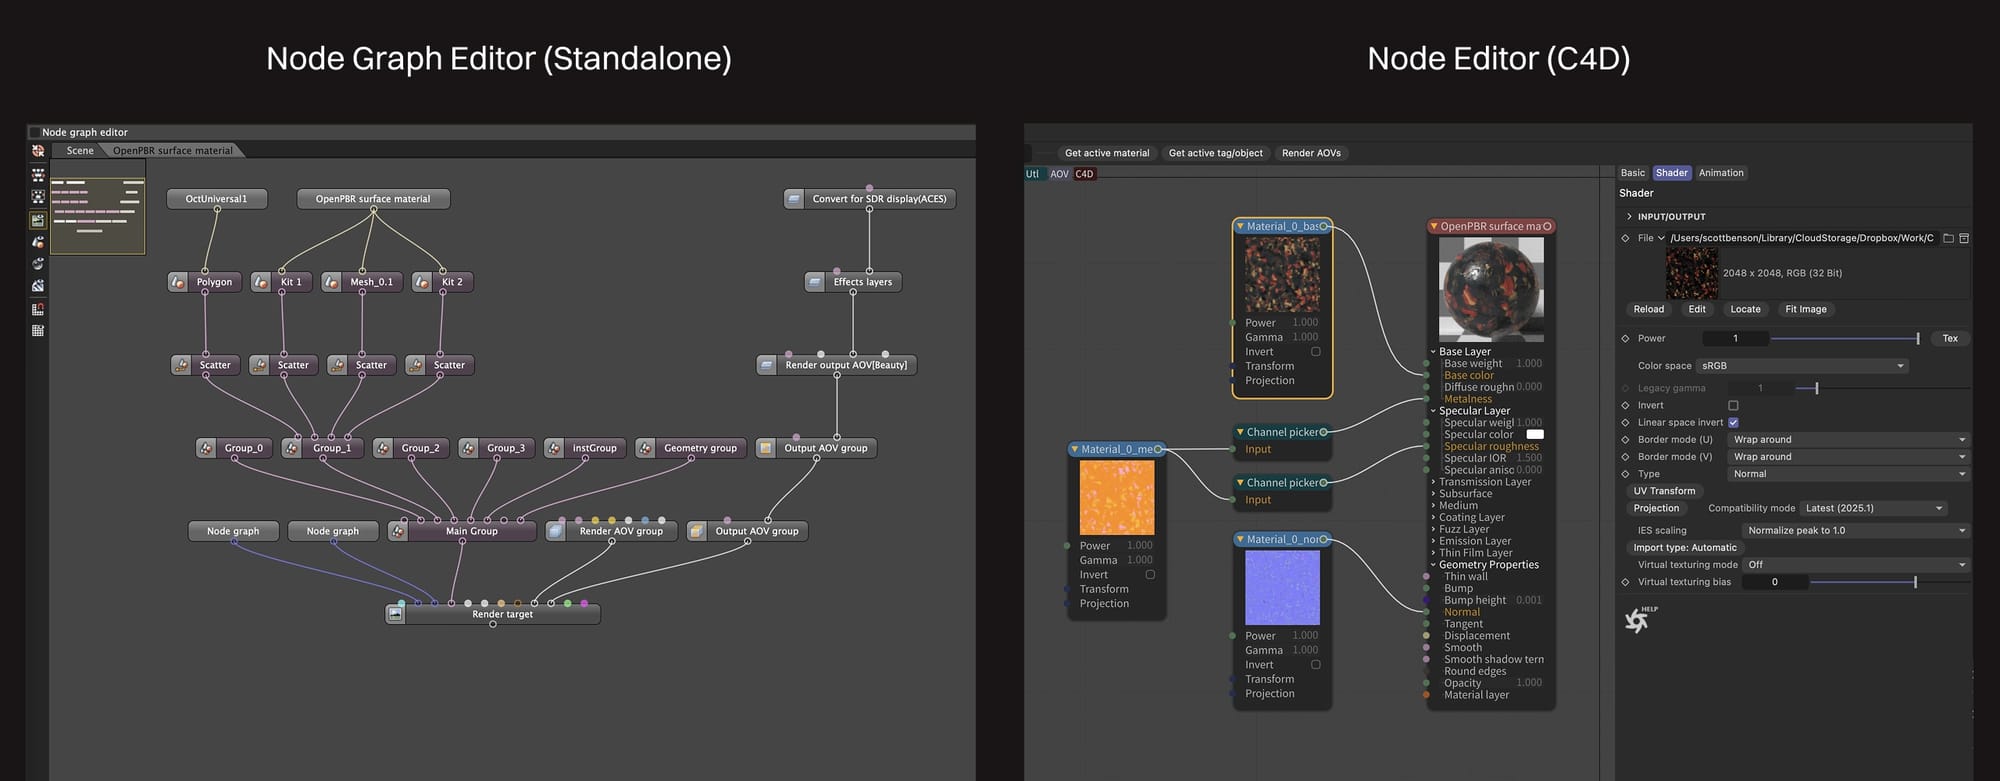 The node graph editor (usually just called the node editor) is the best way to interact with materials and AOVs, and either a good way or the only way to interact with all the other Octane objects.
Most DCCs also have some concept of an attribute manager or property inspector where we can use tabs and up/down arrows to hunt for parameters, but that gets confusing and annoying fast when dealing with anything more complex than changing a single value here and there.
Get in the habit of popping up the node editor for as much as possible, and everything will go much more smoothly.
Learn Your Tool
Each DCC is going to be a very different experience. Some, like Houdini, were built around nodes from the start, so there are going to be a ton of slick QoL treats that will make the experience more pleasant. Others like C4D had an entirely net new system built from scratch. Regardless of the form it takes, it's going to be better than trying to work around a super limited property inspector.
Spend a day learning your DCC's node editor, even if you think you already know it. Figure out all the labeling, grouping, alignment, and color coding systems available and bake them into your everyday use, even if you are only starting out with simple systems. Learn all the different ways to add nodes. Can you drag a wire out, drop it, and get a list of all nodes that can connect to that port? Can you select a bunch of them and use a keyboard shortcut to draw a box around them? Find all these things out.
Also learn what's a bit buggy or difficult and avoid it. If grouping is a problem, keep the graph flat. If collapsing nodes creates problems, avoid doing that.
The node editor is a prime location to bring up Tenet #2: Avoid Conflation. Use soloing and other forms of isolating nodes and groups so that you can play with just that one thing and see how it affects everything else. If it's not doing what you expect, you at least know it's an issue with the very thing you're doing and not three other nodes canceling the effect out.
The Settings|The Settings
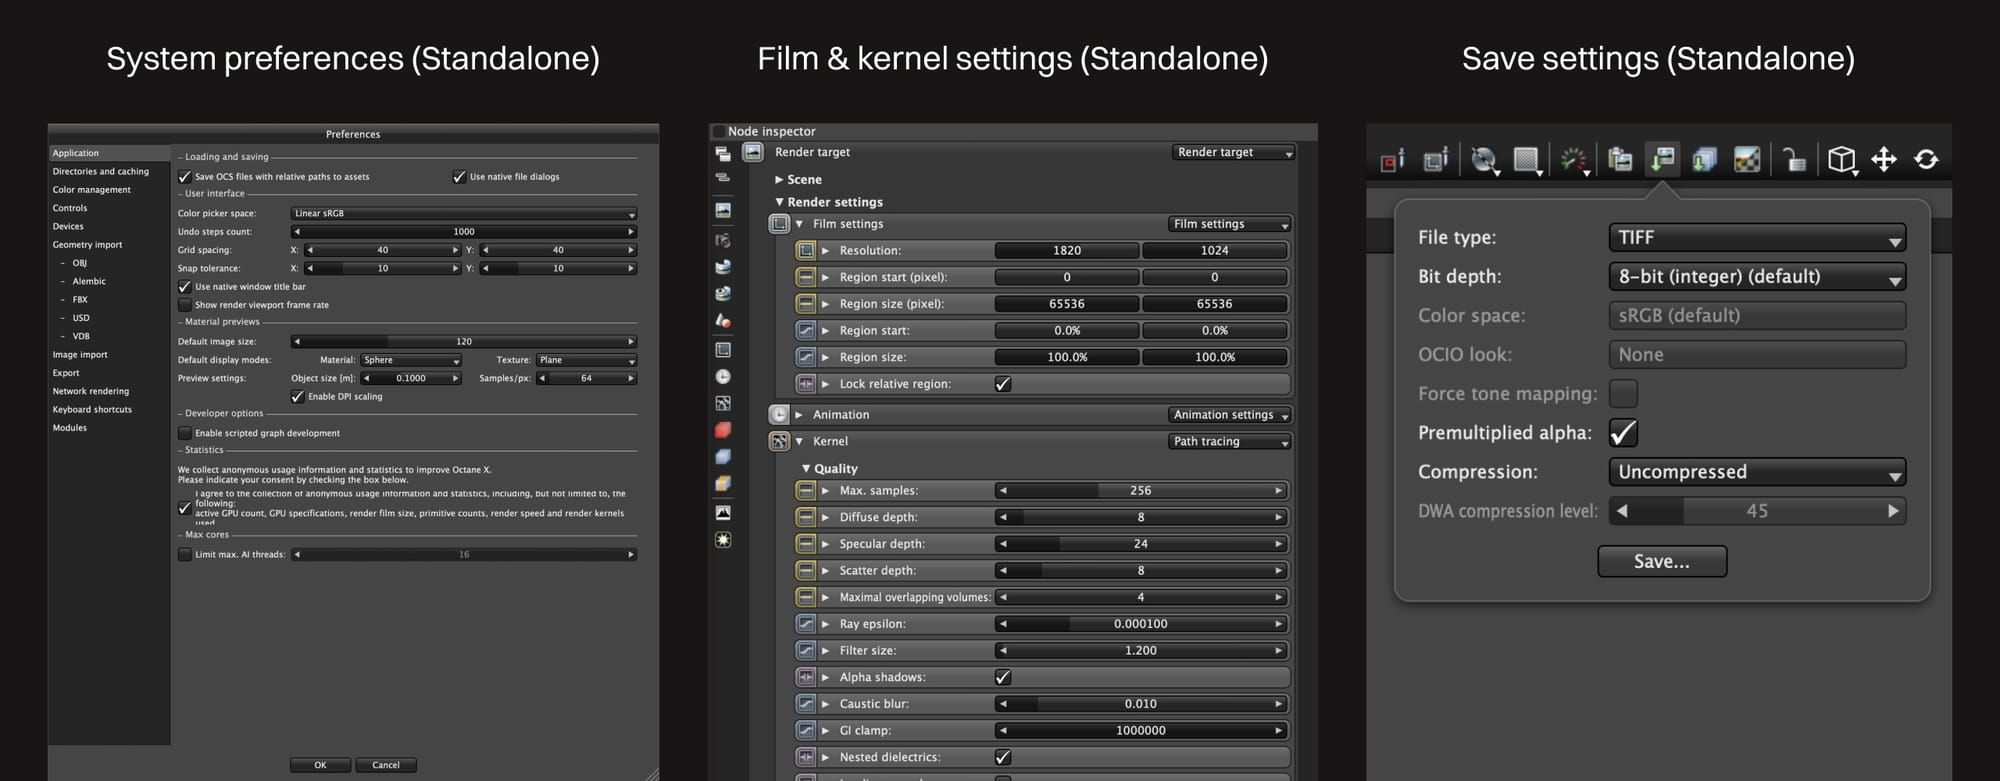 The location of the settings varies wildly from DCC to DCC, but they always fall into one of four buckets:
- System preferences: Global Octane settings that are mostly about file path locations, which GPUs are active, network rendering, and things that affect the UI and functionality of the plugin (or DCC in the case of Standalone).
- Kernel settings: These are per-scene (and sometimes per-camera) options that affect how Octane does its physical calculations. They're the important technicals like max samples, trace depths/bounces, and physical effects that we'll look at in other guides where we have more space. In Standalone, these are located in a Render Target node. In other DCCs, they're often elsewhere, and sometimes in multiple places (three in C4D).
- Film settings: These are different from kernel settings - it's stuff like how large the frame is (in pixels), how many frames are rendering, FPS, and other things that don't change the physical calculations, but still affect what our output is going to be like. Standalone refers to these as "film settings" and groups them with kernel settings under a Render Settings bucket, but they'll appear in other DCCs in different places and using whatever nomenclature is native to the DCC.
- Save settings: Things like file format, compression, bit depth, etc. This is also a bit baffling to new users. Sometimes the save functionality is heavily integrated with the DCC, sometimes it's in a separate window, sometimes both. It's never really cut and dry though, so it's worth investigating.
Wrap Up
Now that we know what to look for in our DCC to start interacting with OctaneRender, we can start getting into that brackish area (lights, materials, and cameras) that we touched on in the first guide.